When configuring an email template for the Email Integration response, use the Email Template wizard. You do not need to complete all the steps required for triggered email templates.
To configure the Email Integration Reply Template:
| 1. | Go to System Admin |
The Email Templates dashboard opens.
| 2. | Click Add to add a new template. |
You are presented with a series of steps to start generating your new template.
| 1. | Complete the form fields. |
|
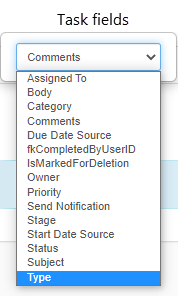
Type |
For Email notifications:
|
|
Triggering Form |
Your selection in the Triggering Form field is the dataform or table where the trigger resides (a field change, a value change). The change to the dataform or table is what triggers the email. Triggering Form is used synonymously with a database table or a dataform. To add a dataform that is not in the list:
The selected dataform is marked as triggerable and now appears in the Triggering Form list. |
|
Template Code |
Must be unique and should be related to the purpose of the email template. |
| Template Name | Provide a short, descriptive name for your template. Displays in the email template list. |
| Description | Provide a useful description of the email template. |
| Execute On | Will this email be sent the first time the form is saved (Insert), only when the form is changed (Update), or every time (Insert or Update)? When there are changes to the dataform that you selected in Triggering Form, the Execute On value controls triggering for Insert, Update, or both Insert and Update. |
| Merge Procedure | Select an optional Merge Procedure here to provide additional system information for field replacement. The procedure can be selected from any stored procedure in the system with a name containing emailtemplate_merge_proc. The list of available merge procedures is filtered based on the Triggering Form selection. Merge Procedure determines the fields that are available to use in field replacement. |
| Execution Pipeline |
Email templates can support multiple pipelines using a multi-select. This allows you to create a single email template that can apply to multiple execution pipelines. Select the pipelines on which the email triggering is to occur. Note: If you are using the Pipeline Linking table to manage Pipeline Behaviors and you are configuring a new email template, pipelines assigned a behavior of Default will auto-fill the Execution Pipeline field. If you are editing an existing email template, Execution Pipeline entries remain intact until edited. Changed entries are validated against the Pipeline Linking table. For instance, if a pipeline has been assigned a behavior of Allow or Default and you remove it, you will still be able to select it from the Execution Pipeline list. If the same pipeline is assigned a behavior of Disallow, you will not be able to add it again. |
| Workspace Templates | Select the Workspace Templates to receive this email. |
|
Include as Activity |
Select this option to attach the email as an Activity. When the email is triggered, the email message attaches to the triggering record. This action preserves the communication of the sent email. By default, the option is cleared, meaning do not include the email as an activity. If you select this option and the email template includes an attachment, the system uploads any attachments to the activity when it is created.. |
| 2. | Click Next. |
Step 2: Content
In the Content step, you provide a Subject and Body – the email message. You can insert information using replacement fields from the See Replace Fields link.
To configure the content of the email:
- Provide a Subject line of the email to be generated.
- Provide the email message in the Body.
This field uses a rich text editor and supports font styling, embedded images, hyperlinks, and so on. Note: Nothing from this field is used in DocuSign email functionality. DocuSign email templates cannot contain replaceable fields. - Click See Replace Fields to select items to copy to the clipboard. You can paste items in Subject and Body as applicable.
See Replacement Fields. - Click Next to proceed.
Step 3: Addresses
Skip this step.
| • | Click Next. |
Step 4: Conditions
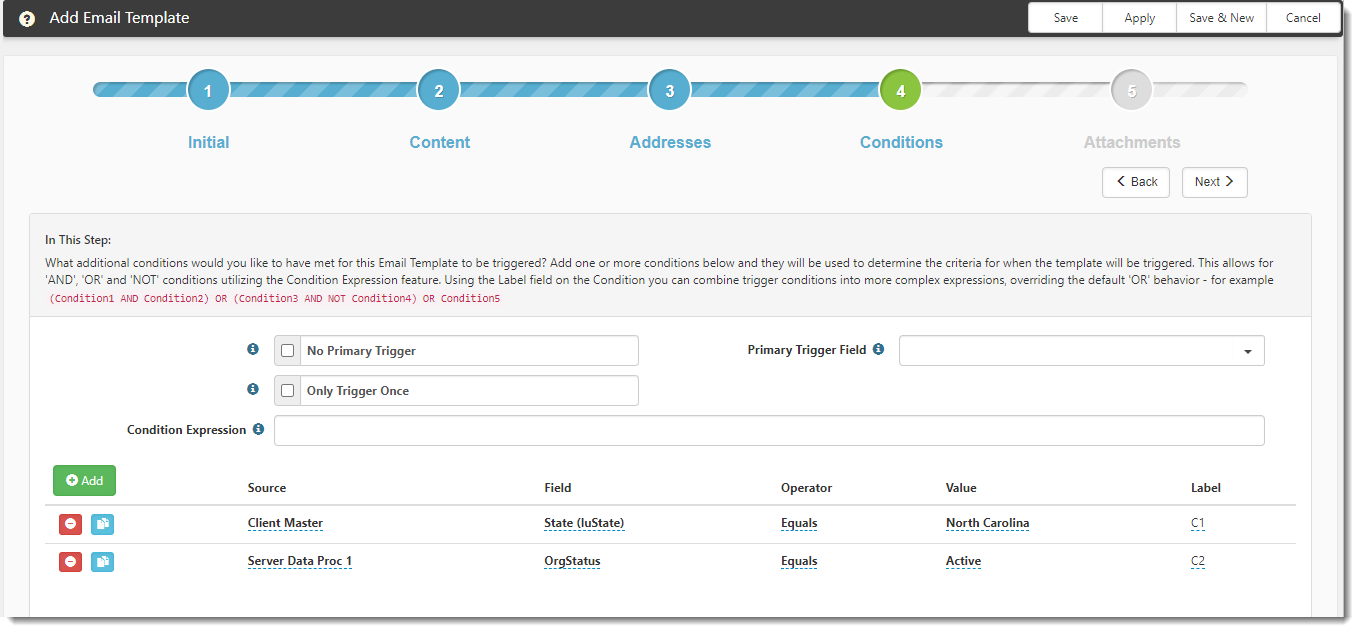
Conditions are display conditions and can also include Condition Expressions. Condition Expressions use the labels that you define for your Display Conditions. For a detailed explanation about conditions, see Condition Expressions.
To configure conditions:
- Complete the fields:
| No Primary Trigger | When selected, no single condition must be met to trigger the email template. When selected, the Primary Trigger Field is disabled. | ||||||||||||
|
Only Trigger Once |
When selected, the email template is triggered only once when the conditions are first met. Do not select this option if you want the email template to trigger each time the conditions are met. |
||||||||||||
|
Primary Trigger Field |
Optional. From the Triggering Form selected in Step 1, which, when changed, triggers the event. This can also be a HdrAction, such as a configured action link on the form.
The following statements refer to the condition entries in the Add area. Condition entries are identified with a Label (the last column).
The Primary Trigger Field only displays fields associated with the triggering dataform and includes the ability to Add Untriggered Field. |
To add display conditions:
- Click Add.
A row opens with columns Source, Field, Operator, Value, and Label. The Add section is where you can add more granular triggering conditions. Each row you add is a display condition. When Condition Expression is empty, the display conditions process as ORs, meaning only one of the conditions must be met for the email notification to trigger.
| Source |
The Source list includes the triggering form and its tabs, the channel trigger (i.e., the original form that started the channel), all triggerable, active single-forms, and the tabs of those single-forms. Applicable server data procs, if configured, may also be included.
When you select Task as the Triggering Form in Step 1 Initial, in this step Source sets to Task. |
| Field |
Select the dataform or Stored Procedure field to compare to the trigger value. A few notes:
To add a trigger field:
|
| Operator |
Choose the type of comparison. Each value from a Multi Lookup Trigger Field can be added as a separate "=" condition. This supports complex AND, OR, and NOT conditions as well. Note:
|
| Value | The criteria against which the trigger field is compared. For a condition that is using a user datatype as the Field, the Value field uses a typeahead method so that you do not need to look up the User ID for the text field. |
| Label |
The label to use when constructing Condition Expressions for triggering. ClientSpace assigns a label to a new condition with the naming convention C#. For example, C1 for the first condition that you create, C2 for the second, and so on. You can change the label name by selecting the name of the label and typing a new name for the label. For example, you can select the C1 label and enter Condition1 as the new label name. Tip: Make this label short and representative of the Trigger Field. Labels are used in the Condition Expression field. |
|
Condition Expression |
Allows for AND, OR, and NOT conditions using the trigger conditions (Label) from the Add section. Using the Label field that corresponds to the entries in the Add section, you can combine the conditions into more complex expressions. The Condition Expression field could state, for example (Condition1 AND Condition2) OR (Condition3 AND Condition4) OR Condition5. Condition Expressions adhere to AND/OR/NOT across tabbed dataform conditions. For a detailed explanation about conditions, see Condition expressions. When the Condition Expression field is empty, the row entries are treated as OR conditions. Only one of the conditions must be met. |
To clone a trigger condition:
To save some time, you can clone a trigger condition and then edit as appropriate.
- In the Add section, locate an entry that you want to copy.
- Click
 Clone.
A new row opens, with the trigger condition copied. Source, Field, and Operator are copied. - You can now edit the new condition as appropriate.
- Click Apply or Save.
- Click Next to proceed through the remaining steps until you Finish the template.
What's next
Proceed to the next topic (Creating, modifying, or deleting Email Integration credentials) to begin the process.


