Case Discussions
Case discussions allow you to communicate effectively with your clients in a conversational manner, directly from the case that they log. When you use case discussions, you can keep much of the communication outside of the case but still connected should you need to reference the discussions. There are two different methods you can choose to communicate via case discussions. Either go to case discussion or email back to discussion.
Adding Case Discussions
Creating a New Discussion
To create a case discussion:
-
Open a client service case.
The Client Service case form opens.
-
Make sure the Client Contact in the "Cast Details" section is specified.
This action ensures that ClientSpace automatically fills in the Reported By, Phone Number, and Email Address fields. Additionally, when you create the case discussion and click Add Recipients later in this process, your name as well as your Client Contact's name will be pre-selected. A best practice is always to select a client contact when possible.
-
In the Action Center, expand Links < More, and click Discuss or Case Discussions.
The Discussions form opens. The left pane displays a list of existing discussion threads. Clicking a discussion tile displays additional tiles in the right pane that represent messages associated with the selected thread. A counter on the discussion tile also shows how many messages are associated with the thread.
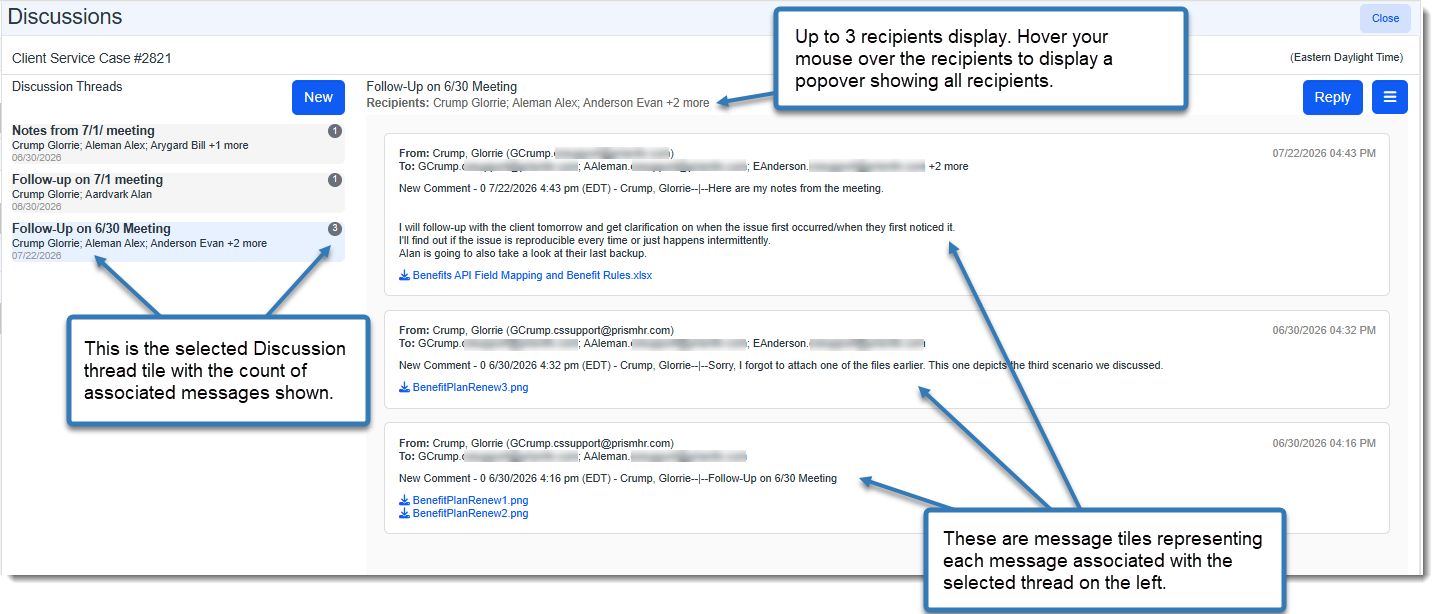
Note: If there are more than 3 recipients on a discussion thread message, you can hover your mouse over the recipients to view a popover containing all recipients.
Composing a New Message
To compose a new message:
-
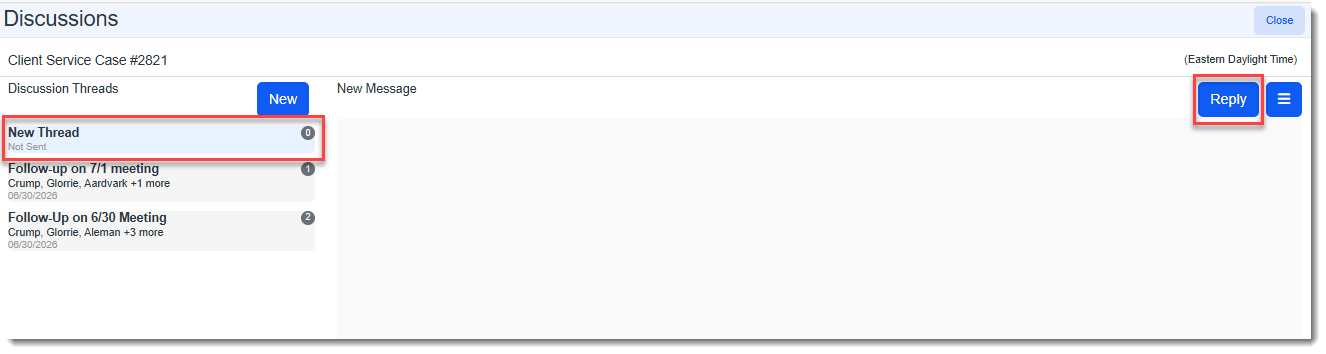
If there are no existing discussion threads, a "New Thread" tile is already selected and you can skip to Step 2. If there are existing discussion threads, click New. A "New Thread" tile is created and is selected by default and the New Message window displays.
-
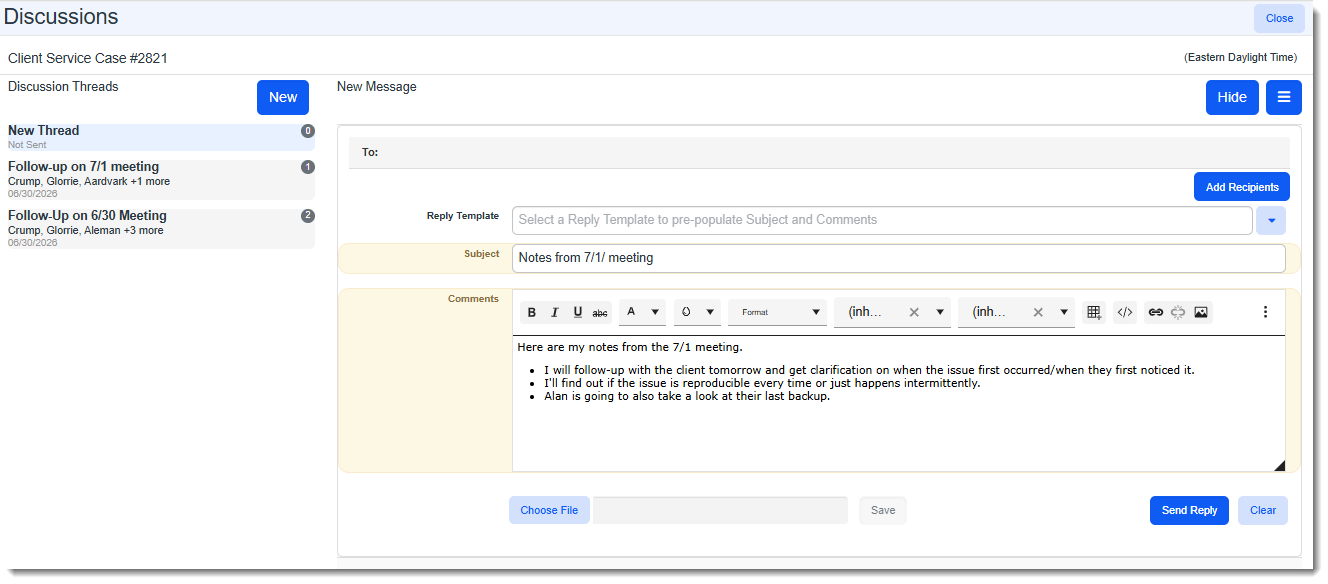
In Subject, enter the subject of the message.
-
In Comments, enter your message.
The comments field supports advanced formatting options, including font selection, size and color, as well as additional formatting, such as bold, italics, bullet points, and so on.
OR
-
Select a Reply Template to pre-populate the Subject and Comments.
Note: As an internal ClientSpace user, you can use our generative AI tool to quickly generate the body text for a new message or reply. Please contact your Professional Services team representative or log an extranet case if you are interested in this feature. Also see Using Generative AI to Create Case Discussion Responses.
Adding an Attachment
To add an attachment:
-
To add an attachment to the discussion, click Choose File.
The Open dialog box opens.
-
Locate the file and click Open.
-
To save the attachment, click Save.
The next step is to select the recipients.
Selecting Recipients
To select the recipients:
-
Click Add Recipients.
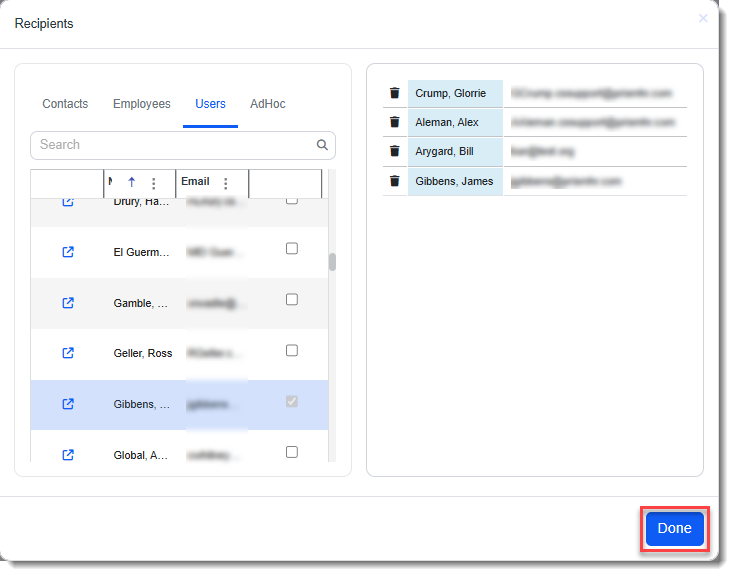
The Recipients window displays This is where you select whom to include in the discussion thread. The Recipients window displays available recipients on the left and selected recipients on the right. The tabs on the left allow you to choose from Contacts, Employees, Users (your co-workers), and AdHoc (where you can enter an email address manually).
-
Complete one or more of the following to add recipients to the discussion thread.
Note: A Search bar at the top of the Contacts, Employees and Users tabs allows you to search for recipients.
-
Select the Contacts tab and select a recipient by clicking the check box for one or more contacts.
-
Select the Employees tab and select a recipient by clicking the check box for one or more employees.
-
Select the Users tab and select a recipient by clicking the check box for one or more users.
-
Select the AdHoc Email tab and complete the following:
-
Enter a valid email address in the Email Address field
-
(optional) Enter a name in the Last Name field
-
(optional) Enter a name in the First Name field
-
Click the Add button
Repeat as necessary for additional AdHoc Email addresses
-
As you select a recipient, the system lists the recipients in the adjacent panel.
-
-
To remove recipients from the list, click
 (Remove).
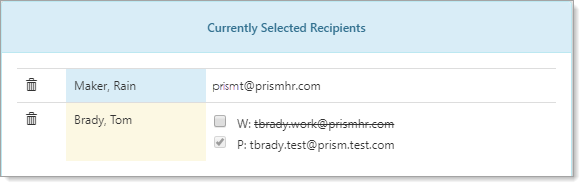
For Employees, you can also select their work or personal email account. By default, the system selects an employee's work email address.
-
When finished adding recipients, click Done to close the window.
Changing an Employee's Default Email Selection from Work to Personal
To change an Employee recipient's email from work to personal:
-
On the Employees tab of the Recipients window, click the checkbox in the left panel next to the employee name to add them as a recipient.
The selected employee is added to the right pane where the employee's work and personal email accounts display beneath their name. The work email is selected by default.
-
To switch to the employee's personal email, click the checkbox next to the employee's personal email address.
-
Click Done.
Sending the Message
To send the message:
Now you are ready to send the message.
-
On the Discussions window with the New Thread still selected, review your comments, recipients, and any attached files.
-
Click Send Reply.
Discussion Messages
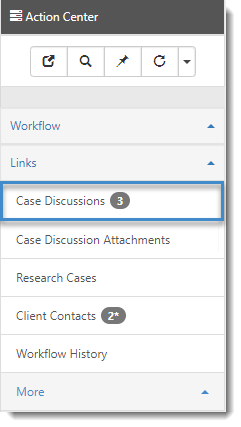
As you add discussions to a case, in the Action Center, the Discussion counter increments, showing you how many discussions are attached to the case. Discussions have threads – there can be multiple messages within a thread, and multiple threads within a Discussion. The counter displays the total number of messages. An asterisk (*) may also display next to the counter if there are any inactive messages.
Discussion Attachments
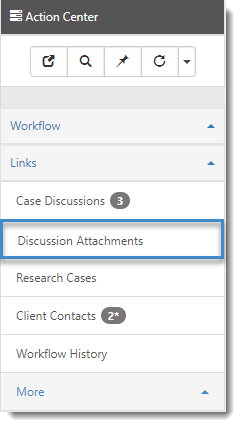
In the Action Center, click the Discussion Attachments link to view all attachments associated with all case discussions on the selected case.
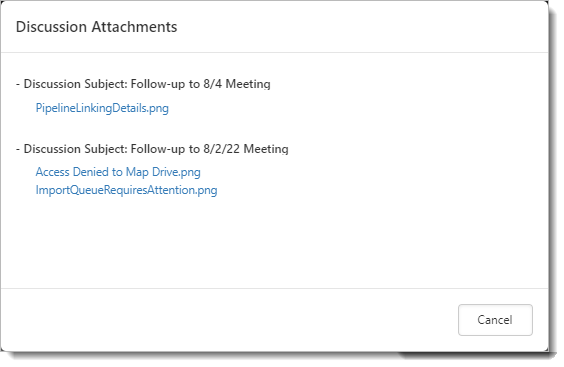
As attachments are added to new discussions and replies, attachments for all discussions associated with the current case are organized in the Discussion Attachments window by Discussion Subject. Only discussions with attachments are listed.
To download a single attachment using the Discussion Attachments link:
Click an attachment name to download an attachment to the Downloads folder of your local computer.
To download a single attachment OR all attachments from a discussion thread:
You can also download attachments from the Discussions window for a thread by clicking the discussion thread on the left to select it and then clicking the Attachments  button.
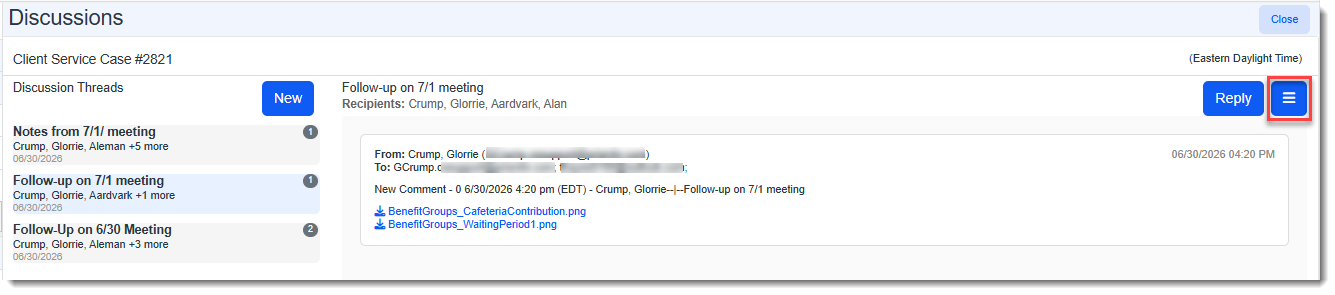
This expands the attachments panel where you can click Download All to download all attachments associated with the thread to your Windows download folder or you can click the download icon  next to a specific attachment to view a single attachment or download a single attachment to your Windows download folder.
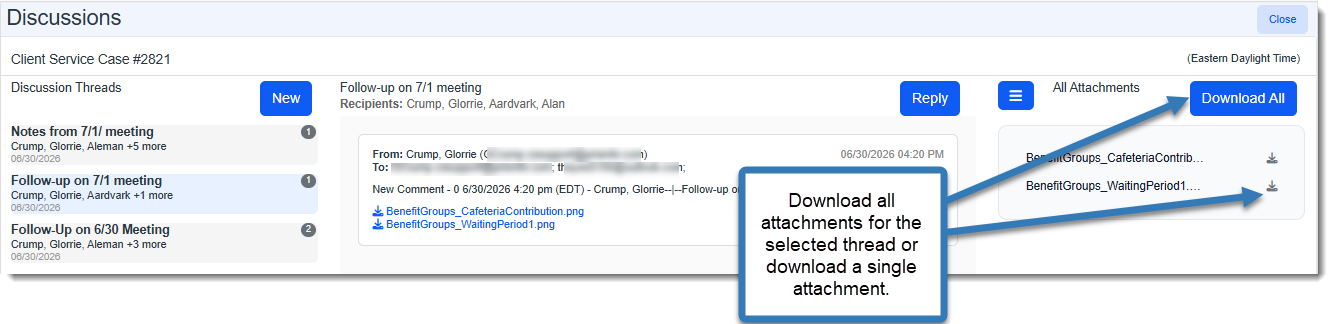
Note: Clicking the Attachments button again hides the attachments panel.
What Happens Next?
| • | When you click Send Reply from the New Message To box, an email is sent to the recipients. |
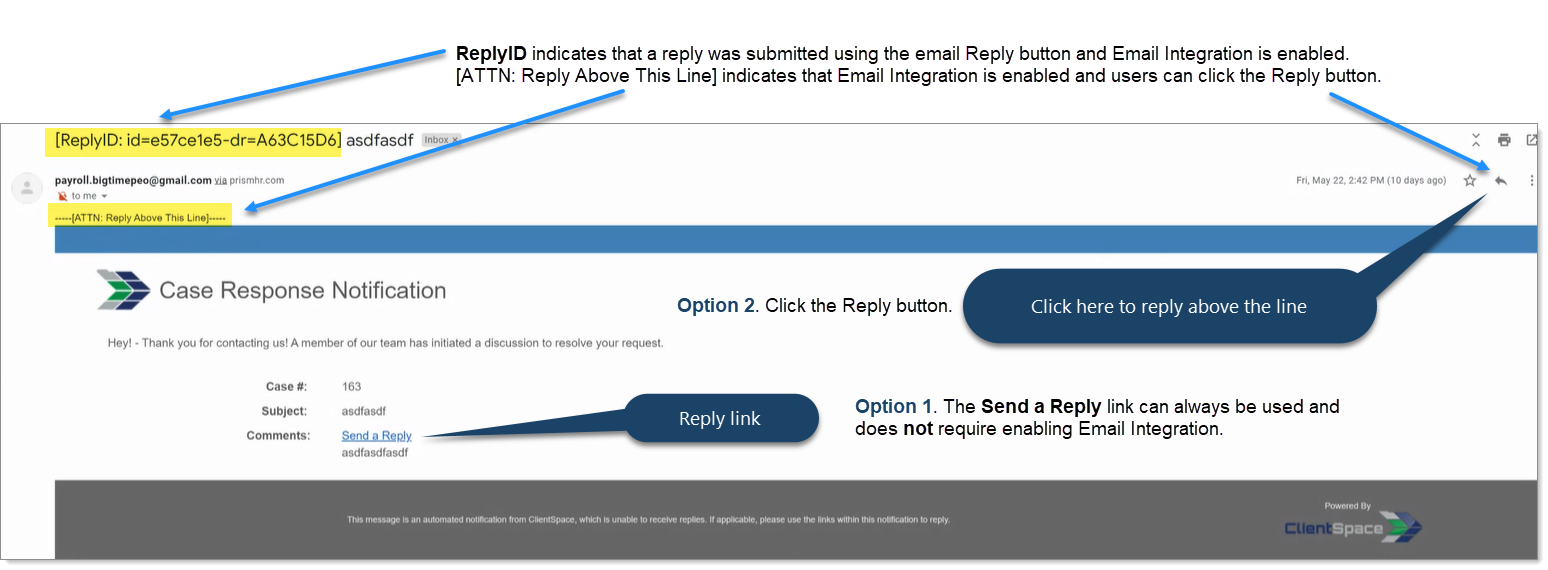
| • | When the recipients open their email, they see a link in the email message, Send a Reply. Clicking the link takes them to the discussion for the case, where the recipients can add comments and Send Reply. (Also refer to Replying to Case Discussions.) Alternatively, if Email Integration is configured (consult your ClientSpace administrator), users can click the email Reply button. |
| • | The original sender of the message also receives a response directly in the case discussion, which they can then review. At this point, the discussion thread starts to build, showing who has been notified, the subject of the discussion, and how many messages are currently attached. |
| • | Additionally, you can create a new discussion for new subjects. |
Note: The system uses the Send Email process to validate email addresses. If an email address is determined to be invalid, the invalid email address is stripped from the resulting email. The email message is then sent to any other email addresses that include valid formatting. The system logs an informational exception to indicate the email address was invalid.
Configuring Case Discussion Email Templates
Case Discussions use email templates to send the content of the Discussion Message to the designated recipients. The email templates that make this happen are CSCDISC: Case Discussion, CSCRPLY: Case Discussion Reply, and CSCDISCNEW: Case Discussion New. ClientSpace administrators can configure these email templates to meet the needs of the organization. For example, you may need several reply templates to address stop payment authorizations or payroll issues.
Send a Reply and Reply Above This Line
Recipients can reply to the email using an embedded Send a Reply link in the email message that opens the discussion thread. The Send a Reply link is always available. Optionally, you can configure ClientSpace to allow responses using the email mailbox Reply button. The Reply button initiates Reply Above This Line functionality.

Reply Above This Line allows users to reply to a Case Discussion directly from their email mailbox using the Reply button, as you would with any other email reply. This functionality requires additional ClientSpace configuration for Email Integration. While the email templates (CSCDISC and CSCDISCNEW) themselves do not require Email Integration, the reply above the line functionality does. For Reply Above This Line to work, both CSCDISC and CSCDISCNEW must have a From Email Override address that matches an Active Email Integration mailbox. See Configuring Case Discussion: Reply Above This Line.
Field Replacement
Case Discussion templates provide replacement field functionality represented as brackets { }. For a list of the fields, see Client Service Case field replacement.
Accessing the Email Templates
To access the email templates:
- Go to System Admin
 > Email Templates.
The Email Templates dashboard opens. - Locate the entries that begin with CSC.
- Open and edit the email template.